Resin 3D Print Calculator — Exposure, Time & Cost
Print time, resin volume & cost, exposure time from cure curve, pixel size · free, no signup
See Resin 3D Print Calculator — Exposure, Time & Cost in action
Free Resin 3D Print Calculator
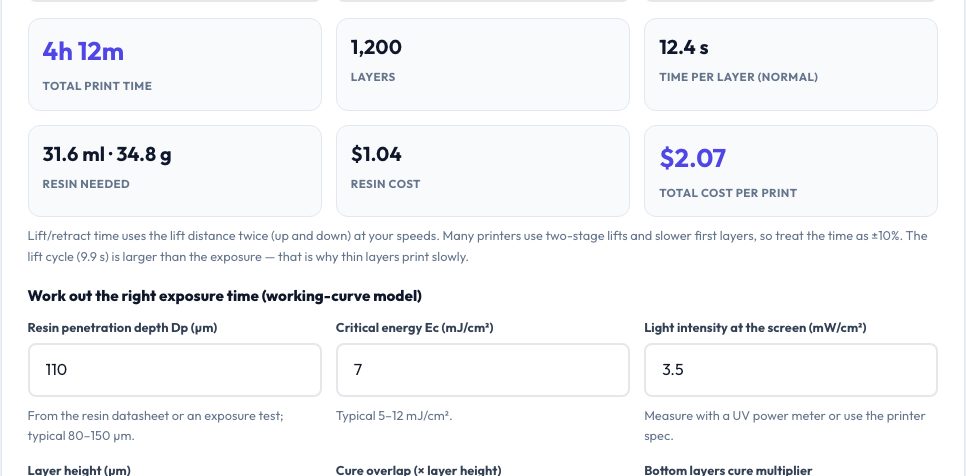
Resin printing has its own arithmetic. Print time is not just layers × exposure: every layer also pays for a lift, retract and wait cycle, which is why thin layers print slowly. Enter the model's volume and height (or drop in an STL to fill them), layer height, bottom layer count and exposures, lift height and speeds and the wait times, and the calculator returns total print time, per-layer time, resin needed including supports and failure allowance, and the cost per print including resin, IPA and electricity.
Two more calculators sit below. The working-curve calculator uses Jacobs' relation Cd = Dp·ln(E/Ec): enter your resin's penetration depth and critical energy and your screen's light intensity and it gives the exposure time needed to cure a chosen depth — a starting point for exposure tests. The pixel-size calculator turns your screen's resolution and width into the XY pixel pitch, showing the real detail limit of your printer.
Key features
Time with lift cycles
Exposure, lift, retract and wait per layer, with burn-in layers.
Resin & cost
Volume with supports and waste, grams, resin cost, IPA and power.
Cure-curve exposure
Normal and bottom exposure from Dp, Ec and light intensity.
Pixel size
XY resolution in microns from screen specs.
How to use it
- Optionally drop your STL for volume and height.
- Enter layer height, exposures, lift and wait times.
- Set supports, waste and resin price.
- Read the time, resin and cost; use the exposure calculator for tuning.
Worked example
Example
A 25 cm³ miniature 60 mm tall at 0.05 mm layers = 1200 layers; with a 2.5 s exposure, 6 mm lift at 65 mm/min and 2 s of waits the layer cycle is about 12.4 s, so the print takes about 4 h 12 min and uses 32 ml of resin (15% supports, 10% waste), costing about $1.04 in resin.
Who uses this tool
Resin printer owners
Quote and plan prints.
Miniature sellers
Cost per model with consumables.
Tinkerers
Calculate exposure from resin data sheets.
Tips for the best results
- The lift cycle often exceeds exposure: use faster, shorter lifts or thicker layers to save hours.
- Cure-depth overlap of 1.3–2× layer height gives good layer bonding.
- Add IPA/gloves costs per print for honest pricing.
- Measure actual light intensity with a UV meter for accurate exposure.
Common mistakes to avoid
- Forgetting supports and raft volume.
- Ignoring the lift time when estimating print time.
- Taking the exposure from the calculator without an exposure test.
Why use AZRS QuickFix?
It is 100% free, needs no signup and has no watermark or usage limits. The tool runs in your browser, so what you type stays on your device, and it works on phones, tablets and desktops. New tools are added every week — bookmark this page or browse the full QuickFix toolbox.
Frequently asked questions
Is the exposure model accurate?
It is the standard Jacobs working-curve model — a good starting point, to be refined with test prints.
What is Dp and Ec?
Dp is the resin's penetration depth, Ec its critical energy; both come from the resin supplier or exposure tests.
Can I load an STL?
Yes — volume and height are filled in; add support height manually.
Is it private?
Yes.